Tag: "technique"
Ion sensitive electrodes preparation
Le 16 Apr 2015 by Jac Lou • Réagir » • ∞ Partage »
These pages describe the different steps in preparing ion sensitive (or ion selective) electrodes. Here we shall consider making potassium selective electrodes, but the principle remains the same whatever the ionic species.
1. The principle. Ionic concentrations changes in the brain micro environment may be measured by inserting an ion sensitive micro pipette into the brain structure under study. The principle of such measurements is to record a voltage signal between both sides of a column of resin which is more or less selective for a specific ion (?). Preparing a micro electrode with such a resin column at its tip is not straightforward but it happens that the potassium resin is rather in the "easy" category as compared to calcium for instance.
Considering the ionic concentrations changes that we expect to find in the brain tissue, the voltage signal recorded through the resin column will be in the millivolt range. In the brain, it is not easy to get the ionic voltage signal in isolation since neuronal activity produces a signal in the same voltage range. So through an electrode prepared with a small column of resin at its tip - let's call it an "ionic" electrode - we should record the voltage produced in response to the ionic concentration difference between the external and internal solutions but also any voltage changes due to an external electrical activity. To be clear, when the electrode is used inside the brain tissue it will deliver a compound signal including an ionic component *and* an extracellular neuronal electrical activity component.
It turns out that, luckily, we are able to get the neuronal voltage signal (more or less) in isolation. For this we need to use a separate standard electrode inserted at the same location as the "ionic" electrode. The signal given by this second electrode may then be substracted from the compound signal given by the "ionic" electrode. Providing that we work correctly, the result is a difference signal representing the ionic concentration changes.
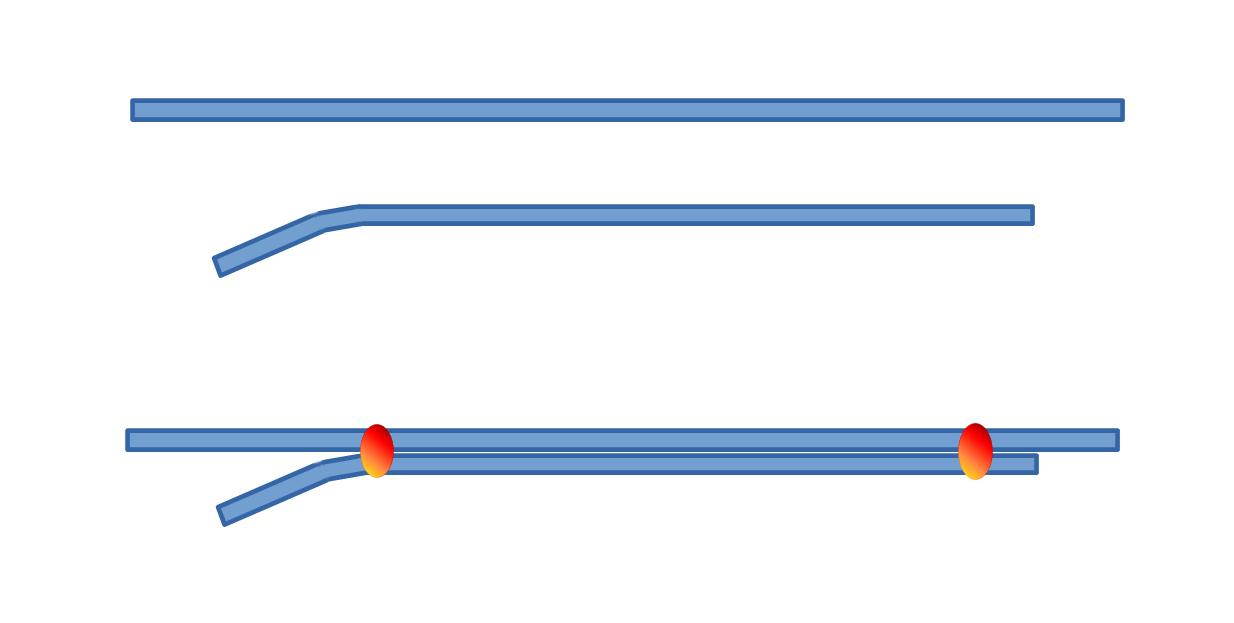
As said before, both electrodes should have their tips as close as possible. This may be achieved either by using a double barrel micropipette or by glueing two electrodes together (the standard electrode tip being slightly bent). It is probably possible to buy double barrel assembly, but if you want to make your own, here is how.
2. What type of glass tubings ? So, we need a double barrel electrode. One barrel will be a standard extracellular electrode, the other one being the "ionic" barrel. Both barrels should have the same properties in order to be pulled together. We shall exclude theta glass which would be so convenient to fill the extracellular side, but which is not adapted to prepare the "ionic" one. My preferred solution consists in glueing together two similar tubings.
- 1 - first cut 2 pieces of standard glass (1 mm or 1.2 mm outer diameter), one about 9 cm long and the other a little longer i.e. 11 cm.
- 2 - smoothen the glass rims in the flame of a butane torch.
- 3 - slightly bend one end of the smaller tubing in the blue cone of the flame.
- 4 - tighten the two pieces of tubing with two small pieces of sticky tape, one at each end
- 5 - glue both tubings together using two rings of cement (one near each end of the assembly). The cement or glue should be of a type that does not change volume while hardening (a dental cement is a good choice). Take care not making these cement rings too big, so that they can get through the oven (filament) when pulling the electrodes (see next sequence of operation).
Now that we have prepared our tubings assembly, we shall have to pull the glass to form the tip. Please see next page (click here or select page 2)


